
You'll need to create a new announcement if you post an announcement and forget to select the "email a copy" check box.
If you edit the announcement and select "email a copy" and post it again, the email won't be sent.
When you use the date picker to schedule announcements, if you manually type a date, it reverts to the default date when you save the announcement.
Announcements can not be created and sent before the course is open. The only way to send an Announcement is if the course is open to students.
Course links can be used for documents and assessments such as tests/quizzes/exams and papers. They cannot be used for discussion links.
Do not work with learning modules where "force sequence" is enabled. If a course link exists in a learning module, it's not possible to enable force sequence.
If the original item (document, assignment, test, etc.) is in a hidden folder or module, the link will remain hidden. If it is visible to students, then it will be visible.
When copying from an Original course, if the prompt is in an initial thread, it will not transfer to Ultra.
Any type of file added to Ultra is local. If you delete the file, it does not remain in the Content Collection. To keep a file in the content collection, you must upload it there first and then add it to the course.
Videos in student preview for instructors are not showing. They appear as grey or white boxes. This is only impacting the Student Preview function - students are able to view the videos.
When new items are copied to an Ultra course from a previous semester, the Progress Tracking defaults to off. Even though it gets turned off, previously stored analytics remain. The only data lost will be between when it defaulted off and when the instructor turned it back on.

New features, fixes, and updates are released monthly!
Keep up to date on all of the exciting changes being implemented in Learn Ultra!
Learn Ultra is Blackboard's most modern, intuitive, and personalized Blackboard Learn user experience. Learn Ultra is characterized by simplified workflows and an accessible, fully responsive design—making it easier than ever to teach and learn from any device.
Watch a video about Learn Ultra:
Discussion analysis provides an in-depth look at each student’s discussion participation, critical thinking level, and sentence complexity. These performance-based insights show you which students who may need help or are out of the normal range of participation.
You can use learning modules in your course as a container for organized collections of content. Modules let students navigate from one content item to the next without distractions or extra clicks. A learning module helps immerse students in the lesson or concept you're teaching.
You can set accommodations for individual students. You can exempt students from assessment due dates or time limits. Use accommodations to help students progress in the course even though they may have difficulty with some requirements.
Setting accommodations now occurs once - you no longer need to make exceptions for each assessment in your course!
If you enable class conversations for individual content items, students can discuss the content with you and their classmates. They can ask for help, share sources, or answer questions others have. As the conversation develops, it appears only with the relevant content. Conversations don't appear on the discussions page.
You can enable conversations for these content items:

You can enable this functionality to give your students an easy way to keep track of what they have done in each one of their courses. When enabling progress tracking later than the beginning of the term, participatory items will be retroactively marked as complete. For example, assessments submitted previously by students will be marked as complete. Non-participatory items, like Ultra documents, will still need to be manually marked by students.
You can enable progress tracking at any time during the term.
Turn progress tracking on for your course:
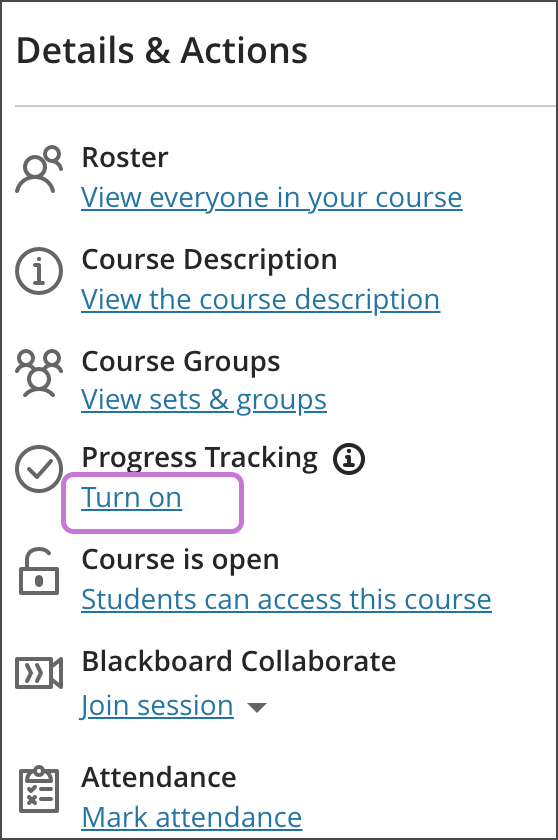
Your students will now see the progress of their course. Every item like content or assessments will display a circle icon showing the progress.
![]()
Students can mark complete items like Documents, uploaded files, or links once they have opened them. For any other items like Assessments, Tests, Journals, or Discussions, the item will automatically be marked as complete when the student has submitted. When all items in a Folder or Module have been completed, the entire folder is automatically marked as complete.
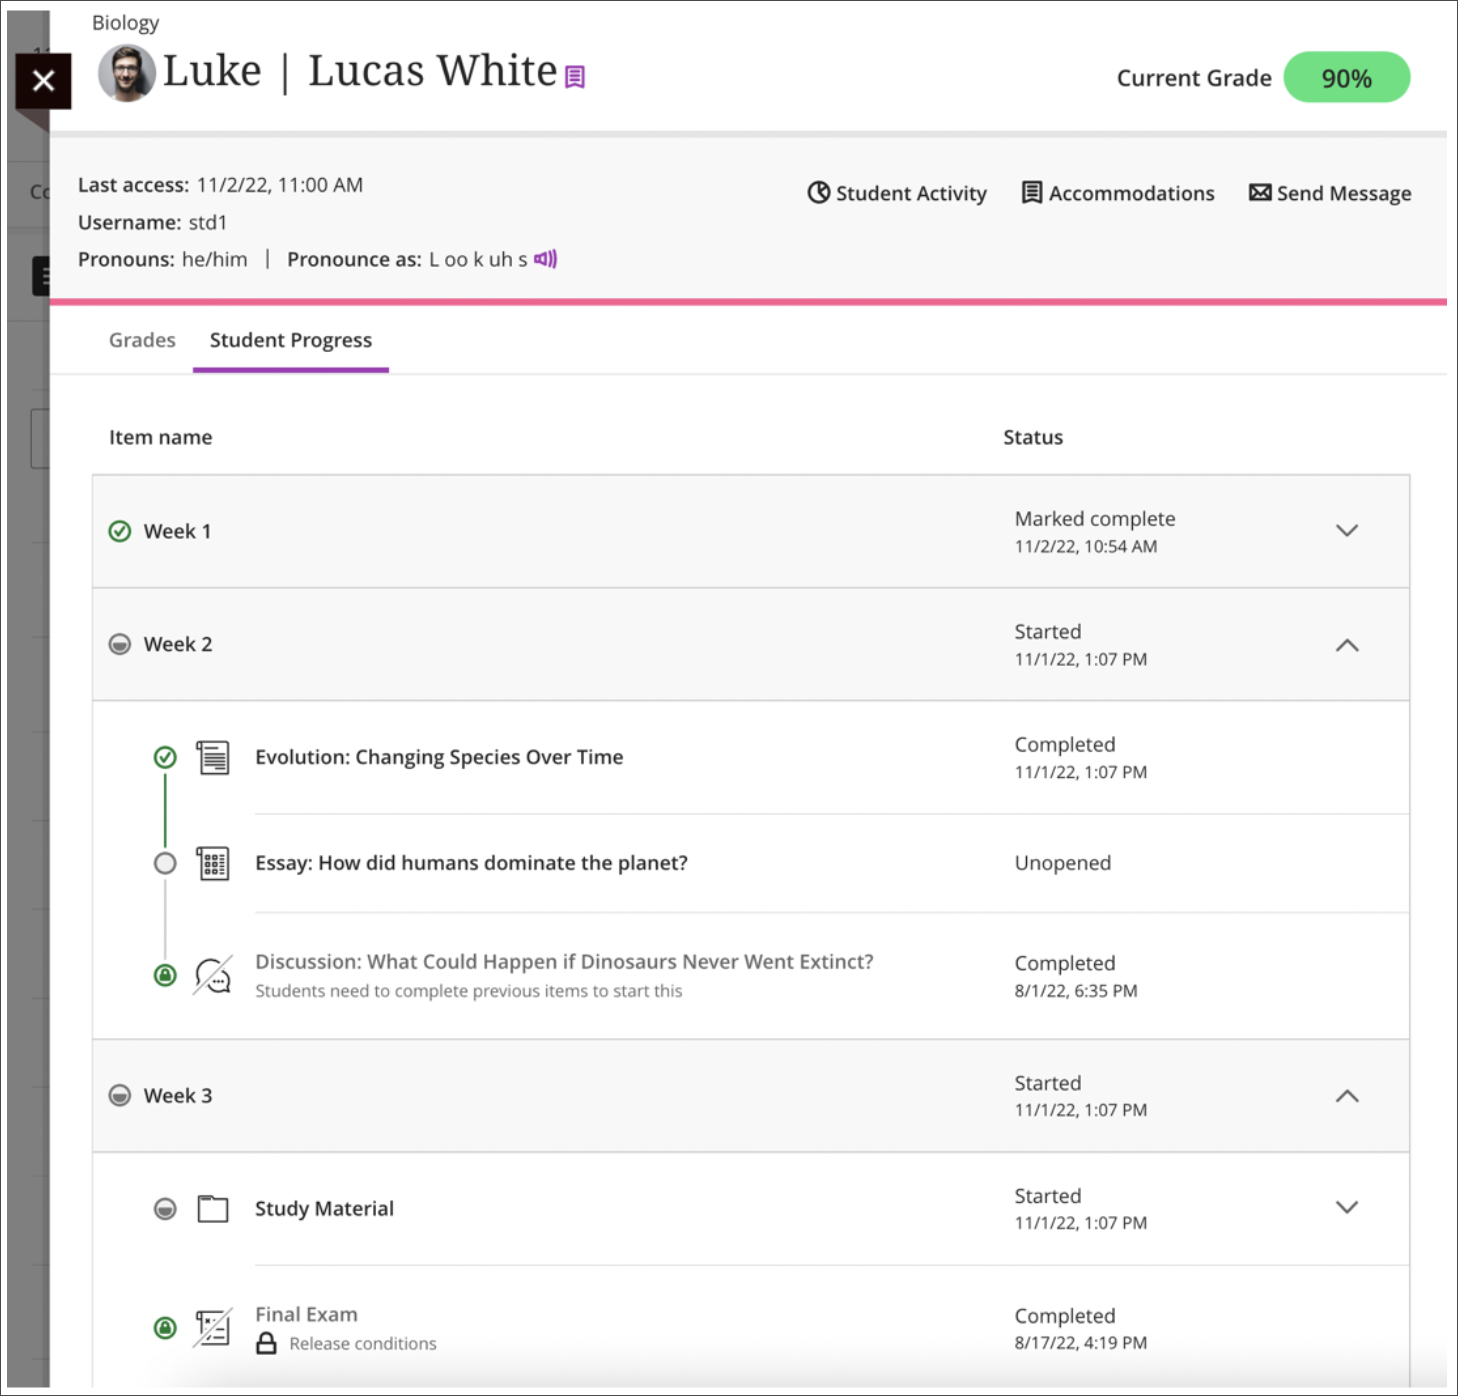
Instructors often desire insight into the progress students are making in their course. This information helps instructors to engage early with students or adjust the course content. Blackboard has created a new single-student progress report. This report focuses on the path each student is taking in the course. In this new report instructors can view:
Instructors can access this new report:
Image 1. Student progress report
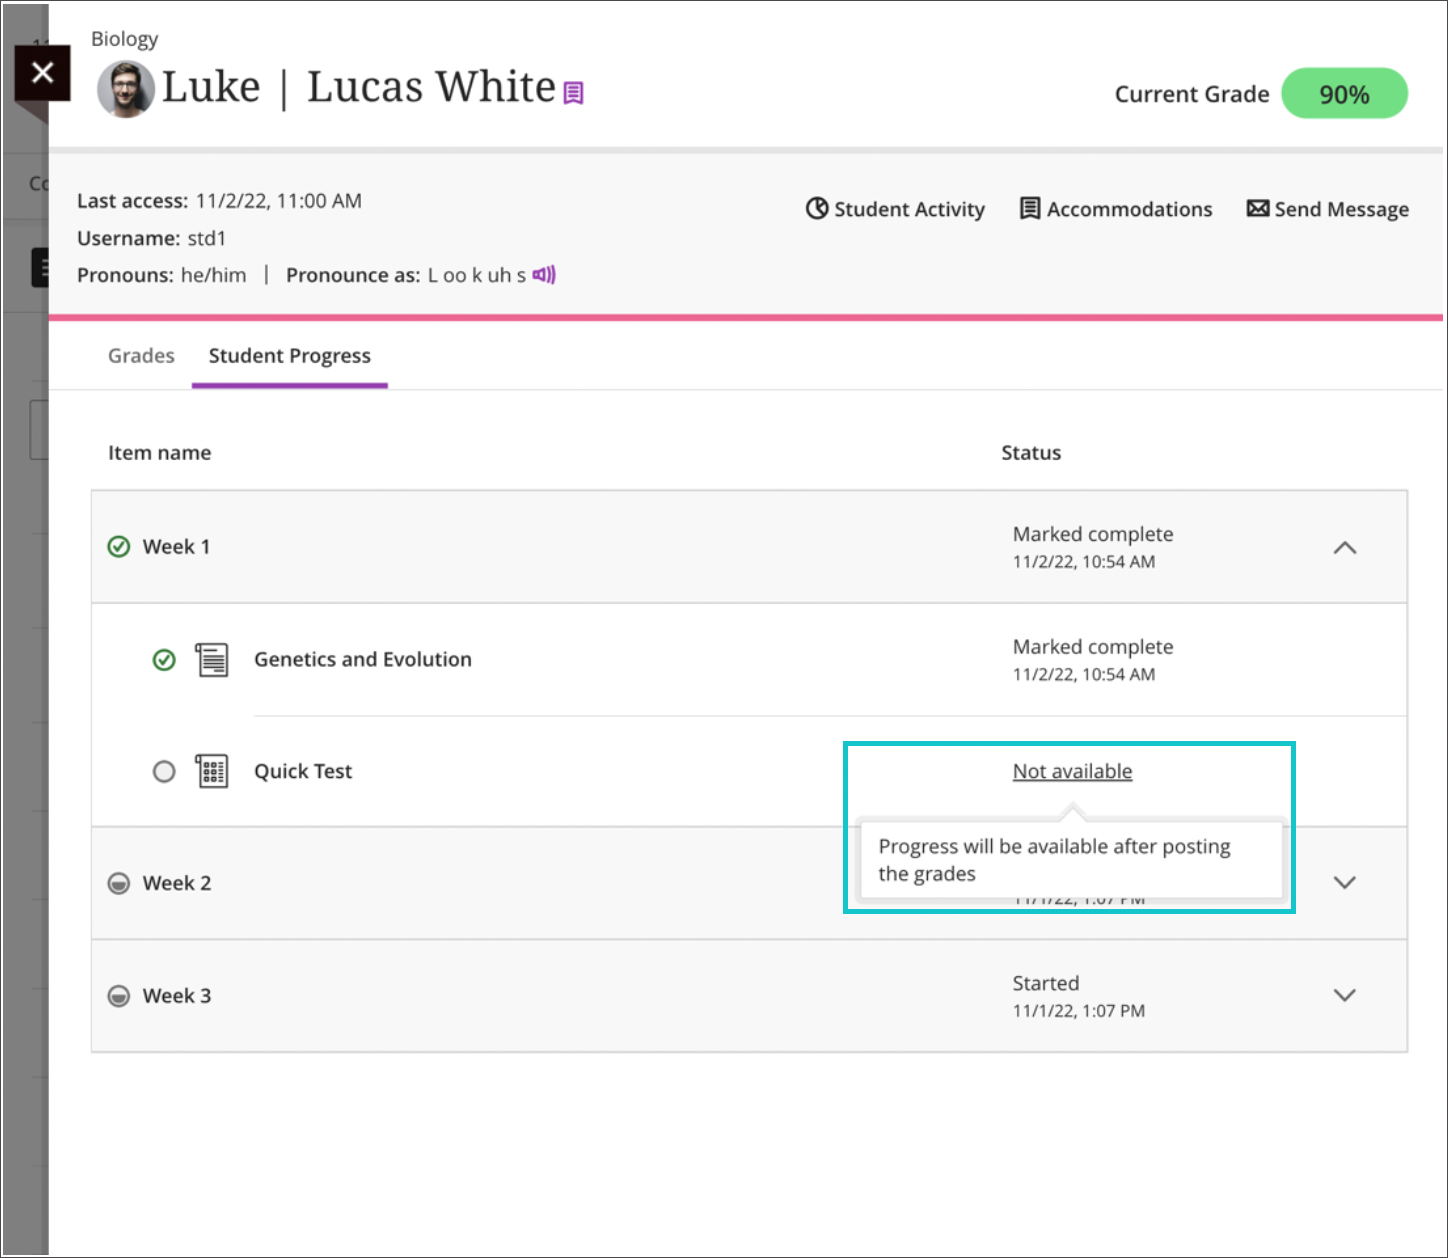
When grading anonymously, the student's progress status is hidden until the instructor posts grades. This ensures the student’s identity remains anonymous during the grading process.
Image 2. Anonymous test progress information hidden
Your profile picture appears on course content pages, course cards, rosters, discussions, conversations, and messages next to your activity. You see student profile pictures throughout your courses in the same areas and in the gradebook.

1-click access to student support resources and teams
The tools area is located in the base navigation and provides users access to global functions that are located outside a course. On this page, you will see tools you have permission to use. The tools that you see, or do not see, are configured by the LMS system administrator. The most important tool here is your Kaltura “My Media” gallery.

Video: Add content to the course content page explains how to add content to your course by creating new content, copying content from other courses, uploading content, or adding content from your Content Collection.
In your Blackboard courses, you can add a variety of content, such as online lectures, multimedia, tests, assignments, and links to websites and social media.
Assignments and Tests (grouped under Assessments in the Course Content Items panel) share the same user interface and options. Many options in the settings are enabled or disabled based on whether at least one question is included in the assessment.
In practice, instructors use these assessments differently. For example, you might create an assignment with instructions for students to submit a file for a grade. In a test, students may answer a series of questions you’ve added to the assessment.
To distinguish between assignments and tests, and to highlight workflows with and without questions, the discussion of tests will emphasize a workflow with added questions.
For a description of a workflow without added questions, go to Create and Edit Assignments.
Calculated Formula questions present students with a question that requires them to make a calculation and respond with a numeric answer. The numbers in the question change with each student and are pulled from a range that you set. The correct answer is a specific value or a range of values.
Learn more about Calculated Formula Questions
Essay questions require students to type an answer in a text box, and you need to grade these questions manually.
When you create a new test, select the plus sign to open the menu and select Add Essay question.
You'll use the same process when creating test and assignment questions.
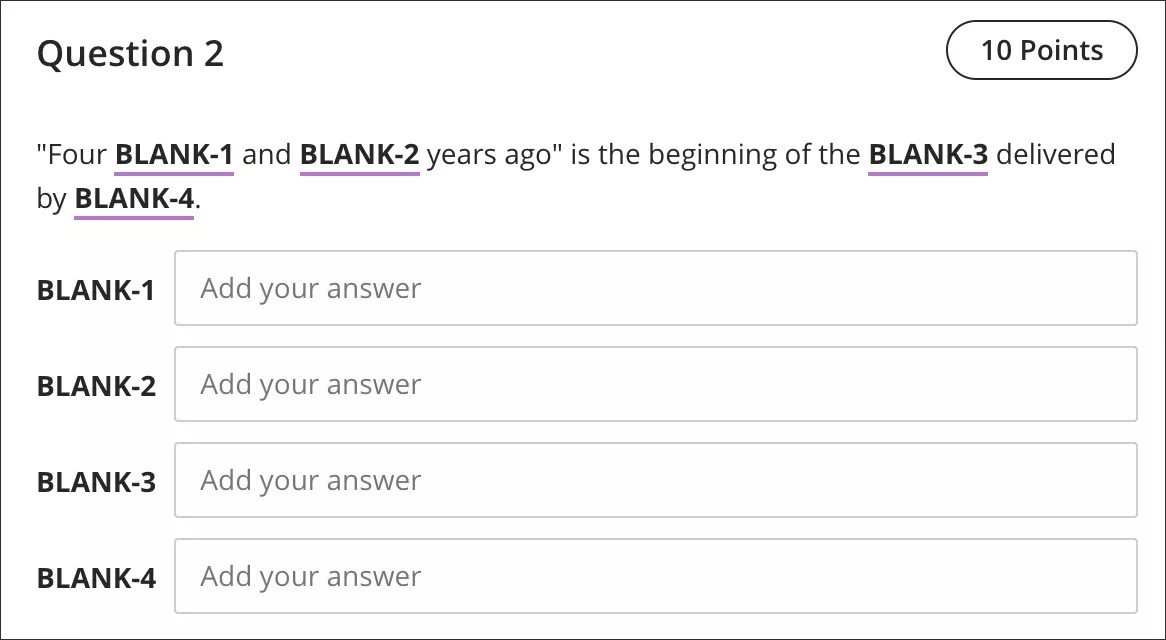
In the Ultra Course View, use the Fill in the Blank question type to create a question with multiple blanks.
More on creating Fill in the Blank questions
For Fill in Multiple Blanks questions, students view text that contains multiple blanks. Students type the appropriate word or phrase for each blank.
Example:
"Four [score] and [seven;7] years ago" is the beginning of the [Gettysburg Address] delivered by [Lincoln]."

Multiple choice and multiple answer questions are graded automatically. If an assessment only has these types of questions, the assessment scores are posted automatically for students to view.
You'll use the same process to create questions in tests and assignments.
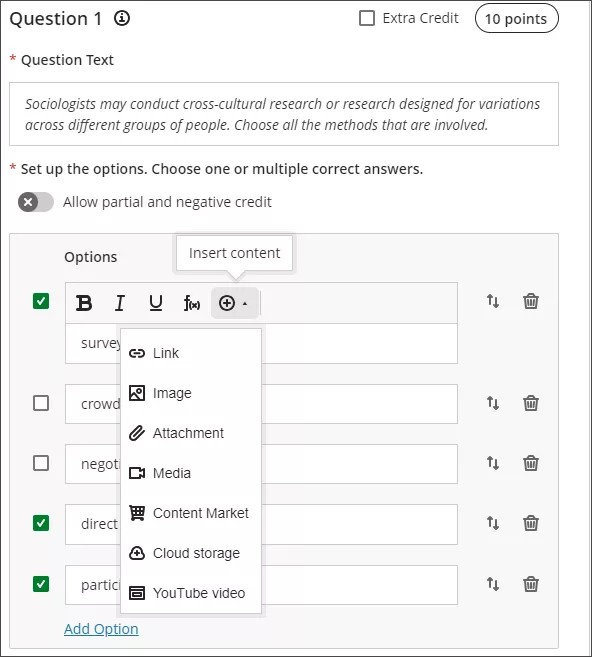
To create multiple-answer questions, use the multiple-choice question type and choose multiple correct answers. You can allow partial credit and negative credit for answers.
New questions don't have a default correct answer. You can't save unless you select at least one correct answer and add text for all your answers.
Questions have a default value of 10 points, but you can select the points box to enter a different value.
If you want more than four answer boxes, select Add Option. You can change the order of answers and delete them as needed.
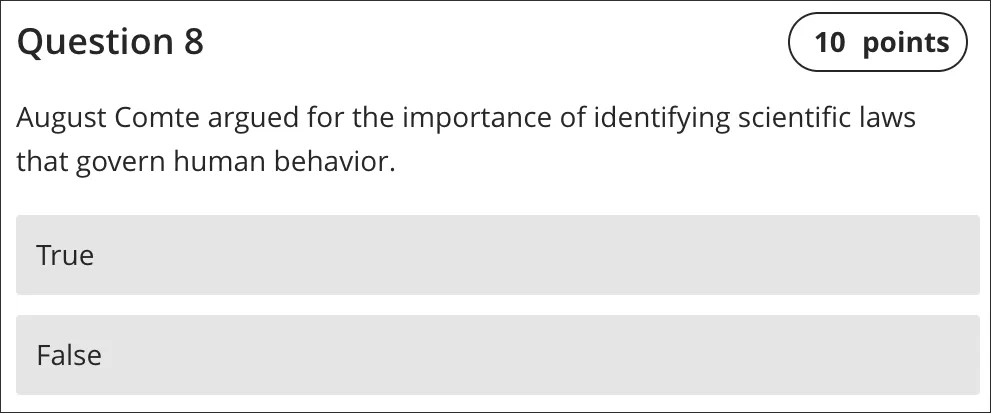
When you create a new test, select the plus sign to open the menu. In an existing test, select the plus sign wherever you want to add a question. Select Add True/False question.
You'll use the same process when you create questions in tests and assignments.
With True/False questions, students choose true or false in response to a statement question. True/False questions are graded automatically. You can't change the points an individual student earned for an automatically graded question.
You can only randomize answers for Matching and Multiple Choice questions. If you want to randomize answers for True/False questions, use the Multiple Choice question type with True and False answer choices.
You can add extra credit questions to allow students to overachieve on an assessment or earn back points lost on other assessments or activities.
A correct answer results in adding the extra credit question points to the points earned for the assessment. Students are not penalized for incorrect answers to an extra credit question. In other words, points are not deducted because the question is excluded from the assessment’s possible points. If a student answers extra credit questions correctly, it may be possible for the student to earn a score greater than 100% on the assessment.
Students can discern how many extra credit points are available on the assessment. While students are taking an assessment, they can identify questions designated as extra credit. Students can also filter the test to find extra credit questions if present.