As of September 1, 2021, videos recorded to the Zoom cloud will be automatically removed after 6 months. However, recordings to the Zoom Cloud are automatically backed up to Kaltura, the university's cloud video storage solution, and you will be able to access your videos there. To review your Kaltura Media Gallery to ensure recordings have been transferred, you may either use Blackboard or open a web browser:
To use your Kaltura media within your Blackboard course, please visit the Kaltura tools page for additional guidance.
To join a scheduled course meeting:

If your instructor sent out a meeting invite via Outlook or posted it in your course, you can join the meeting right from the URL they posted too!

2) Sign in to Zoom with your MCPHS UID/PW
or if needed
3) Quick links to support, resources, and the Help Desk
Many features require the download and installation of the Zoom Meetings client. You may download the client directly from the https://mcphs.zoom.us page.
Always ensure you are logging into your MCPHS-provided Zoom account (Steps Below).

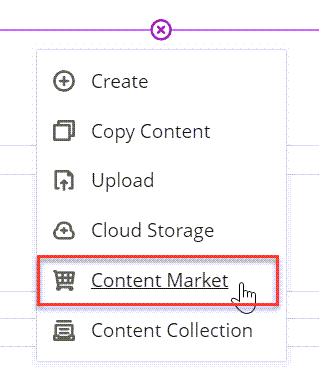
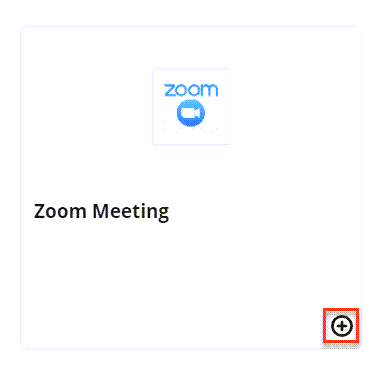
The first step to integrating Zoom is setting up the tool link in Blackboard.


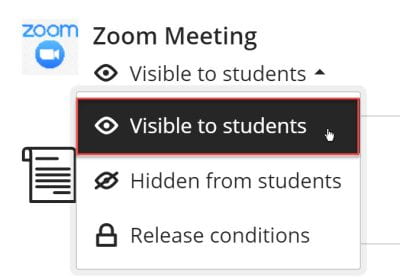
Note: You will not be able to test this link with Student Preview in Blackboard. As long as the link works with your instructor account and is not hidden, then your students will be able to see it.
You now have your link set up in your course!

Concerned about "Zoom Bombing"? Want to ensure you're setting up your meetings securely? Start here!
The Waiting Room feature is one of the best ways to protect your Zoom meeting space.
When you enable this feature, there's two options to manage the experience:
Locking your meeting works just like closing your classroom door after the session starts. You can give participants a few minutes to join and then simply lock the meeting to disallow late entrants.
Learn all about managing your participants

Disable "Join Before Host". Participants won't be able to join into the meeting space until you have arrived and are in place to view chat, etc.
They'll see a notice similar to:

As a host, you have a variety of important controls to help maintain the meeting environment for you and your participants.
Here's a quick overview:
It's important to get comfortable with the settings available to you; and recognize that some features are dependent on how you start your meeting.
Find out more via Zoom's Help Center
Before joining a Zoom meeting on a computer or mobile device, you can download the Zoom app from our Download Center. Otherwise, you will be prompted to download and install Zoom when you click a join link.
You can also join a test meeting to familiarize yourself with Zoom.
There are two ways to join meeting audio, joining via computer or joining via telephone. Follow these sections to test your audio before or after joining a meeting.
You can also join a test meeting if you want to test your audio and familiarize yourself with meeting controls.
Zoom offers multiple methods to schedule a meeting. A host has control over the options for their scheduled meetings except for settings that an administrator has locked for all users in the account or for all members of a specific group.
Host controls allow you as the host to control various aspects of the Zoom Meeting, such as managing the participants.
The co-host feature allows the host to share hosting privileges with another user, allowing the co-host to manage the administrative side of the meeting, such as managing participants or starting/stopping the recording. The host must assign a co-host. There is no limitation on the number of co-hosts you can have in a meeting or webinar.
Co-hosts do not have access to the following controls as they are only available as host controls in a meeting:
Co-hosts also cannot start a meeting. If a host needs someone else to be able to start the meeting, they can assign an alternative host.
Breakout Rooms allow you to split your Zoom meeting in up to 50 separate sessions. The meeting host can choose to split the participants of the meeting into these separate sessions automatically or manually, and can switch between sessions at any time.
If the meeting is being cloud recorded, it will only record the main room, regardless of what room the meeting host is in. If local recording is being used, it will record the room the participant who is recording is in. Multiple participants can record locally.
This article covers:
Learn how to manage breakout rooms.
To manage breakout rooms as the host
Note: Users joined into the Zoom meeting from the Zoom Desktop Client, Zoom Mobile App, or H.323/SIP devices can participate in breakout rooms. Users joined via the web client and Zoom Rooms are unable to join Breakout Rooms, but the main room can be used as an alternative session for these users.
Zoom allows for screen sharing on desktop, tablet and mobile devices running Zoom.
The polling feature for meetings allows you to create single choice or multiple choice polling questions for your meetings. You will be able to launch the poll during your meeting and gather the responses from your attendees. You also have the ability to download a report of polling after the meeting. Polls can also be conducted anonymously, if you do not wish to collect participant information with the poll results.
Notes: To generate and view a report, ensure that the following requirements are met: